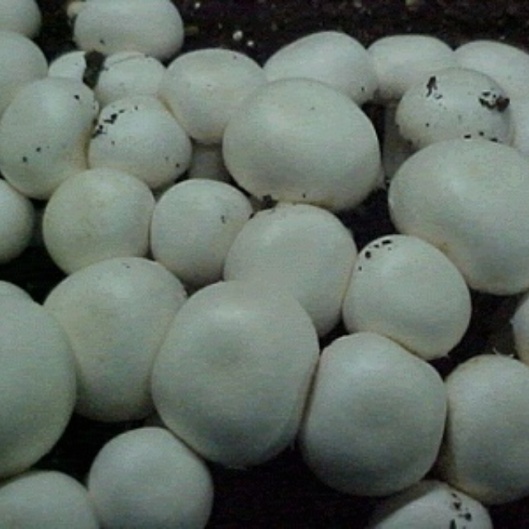
Commercial Button Mushroom Cultivation (basic requirements)——

Commercial Button Mushroom Cultivation (basic requirements)——-
White button mushroom is a temperate mushroom requiring cooler climate for its growth. It is an indoor crop and is an ideal tool in converting agricultural wastes in to proteinaceous food. In early days its cultivation was mainly confined to the hills. In the eighties growers realized the potential of this crop and started its cultivation in the northern plains in the winter when the climate was suitable

image

for its growth. Many entrepreneurs in the plains further ventured and started its cultivation round the year by employing artificial cooling facilities (chilling stations). Today its cultivation is done through out the country Some are doing it seasonally while many of them have preferred to go for round the year cultivation. Today India boasts of having world biggest farm, the Agro Dutch Foods Ltd, Lalru Punjab and many more environment controlled units exit in different parts of the country cultivating this mushroom round the year.

Mushroom being an indoor crop does not require arable land, except for some non agricultural land to build the infrastructure for preparation of substrate, raising of crop preparation of spawn and postharvest handling. As mentioned above this mushroom is grown seasonally and in environment controlled cropping houses and both require building of basic infrastructure. Seasonal growing is done for 3-4 months when outside temperatures are favourable for the crop, i.e., during winter months in N.W. plains and from September to April in the hills .

Seasonal cultivators of this mushroom are using traditional methods of its cultivation and are mainly cultivating this mushroom in the thatched structures employing long method of composting. They usually take single crop in the entire season and are harvesting 12-15 kg mushrooms/ 100 kg compost. Environment controlled units are cultivating this mushroom round the year by having suitable infrastructure at their disposal which includes a modern composting yard having bulk pasteurization facilities. Of late few of them have shifted to indoor composting while new upcoming units have chosen to produce their compost entirely by indoor method. Besides these facilities they are having insulated cropping rooms and other ancillary structures required for mushroom cultivation. Few of the bigger units are having their own spawn lab and processing unit as well. An entrepreneur can start mushroom cultivation  employing suitable climate control facilities. Suitable infrastructure including different machineries are required at the farm to carry out different operations to govern the whole process of cultivation in such a fashion so that one gets optimum returns from his farm in this competitive environment. The one who designs the farm in most scientific manner looking to the need of the crop and easy accessibility to the different infrastructure for their operation convenience in less space, utilizing less money will gain handsome returns in the years to come. Present chapter would deal in detail the infrastructure and machineries required for the seasonal and environment controlled units.

A. Selection of Site and Pre-Requisites

Before selection of site, the following points have to be taken into consideration for greater operational efficiency and cost effective production of mushrooms at the farm:

1. Chosen site should preferably be away from the municipal limits and entrepreneur should purchase sufficient land in one go looking to the future expansion.

2. The site should be serviced by a motorable road, or nearer to a road head to reduce costs on transportation of raw materials to the farm/finished product to the market.

3. Plentiful availability of water at the site either through a perennial source or should have sufficient underground water.

4. Easy availability of raw materials especially straw and poultry manure around the chosen site at cheaper rates in the area.

5. Availability of cheap labour in abundance.

6. Uninterrupted proper power supply at the chosen site.

7. Nearness to the market for the proper disposal of the produce.

Substrate Preparation for White Button Mushrooms


                   A few practical tips on Phase I and Phase II substrate (compost), and the substrate preparation (composting) process, and formulating mushroom compost.               
I.  Guidelines for calculating nitrogen (N) content:
    1. Calculate the starting N content of pile to be 1.5 to 1.7%  before composting. The starting N for a synthetic compost formulas may  be slightly higher than the wheat straw horse manure formulas.
    2. The percent N will increase throughout Phase I composting and Phase II and  at spawning time the N content of the compost should be 2.1-2.3 %.
    3. Knowing the N and % moisture of the bulk ingredients and supplements will  increase the accuracy of the calculated and finished nitrogen content.
    4. If supplements are added by volume, occasionally weigh volume added to confirm calculated formula.
    5. At the end of Phase I and again at the end of Phase II, compost may be  analyzed for N, ammonia, ash and moisture. It is important to take a  representative samples, several small handfuls thoroughly mixed. When  taking a sample do not shake the compost.

II.  Examples of Mushroom Compost Formulas

Horse manure pile

Ingredients           Wet Wt.         Dry Wt.        %N Tons N
Horse manure 80 T 50 T 1.2% 0.6 T
Poultry manure 7.5 T 6.0 T 4 % 0.24 T
Brewers Grains 2.5 T 2.5 T 4 % 0.1 T
Gypsum 1.25 T 1.25 T 0 0
        59.75 T   0.94÷59.75=1.57%

Synthetic Pile

Ingredients Wet Wt. Dry Wt. %N Tons N
Hay 15 T 12.8 T 2.0 % 0.26 T
Cobs 15 T 12.8 T 0.3 % 0.04 T
Poultry manure 3.8 T 2.4 T 4 % 0.09 T
NH4NO3 0.3 T 0.3 T 32% 0.10 T
Potash 0.3 T 0.3 T 0.0 0.00
Gypsum 0.6 T 0.6 T 0.0 0.00
    29.2 T   0.49÷29.2=1.68%

Horse Manure-synthetic Blend

Ingredients Wet Wt. Dry Wt. %N Tons N
Horse manure 15 T 10.5 T 1.2% 0.13
Hay 7.5 T 6.3 T 1.1% 0.07
Corn Cobs 7.5 T 6.4 T 0.3% 0.02
Brewer’s grains 3.0 T 3.0 T 4.0% 0.12
Poultry manure 2.0 T 2.0 T 4.5% 0.09
Urea 0.1 T 0.1 T 44.0% 0.06
Potash 0.2 T 0.2 T 0.0% 0.00
Gypsum 1.0 T 1.0 T 0.0% 0.00
    29.5   0.49÷29.5=1.66

III. Suggested watering procedures during composting:

    1. Add as much water as possible without run off during pre-wet conditioning or during the first two turns.
    2. Avoid adding too much water early during Phase I, always be able to control moisture.
    3. Add only enough during next turn or turns to wet dry spots.
    4. Bring up compost moisture to desired water content by adequate watering just before filling.
    5. During pre-wet it is advisable to flip or turn the compost every day. After  the rick or pile is built, the compost should be turn every other day  unless pile temperatures have not peaked.

IV. Changes in organic matter, carbohydrates and nitrogen during mushroom composting.

    1. Soluble carbohydrates are simply adsorbed by the micro-organisms and it is converted into new living mater or provides energy for the  cells.
    2. As these micro-organism grow energy in the form of heat is released.
    3. As the pile heats to temperature above 150o F the activities occurring  within the pile change from biological to chemical reactions.
    4. It is at these higher temperatures that carmelization takes place.  Carmelization is the process where water is eliminated from the  carbohydrates and carbon is concentrated. This process can be compared  to boiling sap down to make maple sugar.

V. Phase I is considered complete when as soon as the raw ingredients become pliable and are capable of holding water, the odor of ammonia is sharp and the dark brown color indicates carmelization and browning  reactions have occurred.

    1. Moisture content at filling should be 70-73%. Water should drip  from compost squeezed in the hand. But a good rule of thumb to follow  is: the longer, greener or more coarse the compost then more moisture it can take. The shorter, more mature or dense the compost the less water  it should have.
    2. The shorter or wetter the compost, the more  loosely it should be filled into the beds or trays. The longer or  greener the compost, the more it can be firmed into the beds.
    3. Attempt to fill uniformly in both depth and compaction.
    4. Edges or sideboards should be packed slightly tighter, whereas the center should remain looser.

VI. Phase II composting has two objectives:

    1. Pasteurization – elimination of undesirable insect pest, microbes and pathogens.
    2. Conditioning – Creation of specific food for the mushroom and creating a selective  and suppressive compost to favor the growth of the mushroom.

VII. Insure adequate ventilation during Phase II. When in doubt, ventilate. A flame should be burn at all times.

    1. The higher the nitrogen content of compost, the greener the  compost or the more dry weight at filling time, the greater the  ventilation required.
    2. When outside temperature is high as in  summer or early fall, more ventilation is required than when Phase II  occurs during the cold winter weather. This is especially important when the grower does not have a forced air ventilation system.

VIII. During Phase II keep compost in the temperature range where microorganisms grow best (115-140o F).

    1. Microbes convert ammonia and ammonia containing salts into protein and other nitrogen compounds the mushroom uses for food.
    2. The growth of these microbes depends on having the available food, adequate moisture, sufficient oxygen and suitable temperature. A shortage of one of these requirements will limit growth and often results in incomplete conditioning.

IX. Heat up (pasteurization) for insect kill early in Phase II  (perhaps 1-4 days after filling) so as to avoid a second heating cycle  of the compost.

  1. A good indication that the compost is ready to pasteurized, is  the subsiding of microbial activity, which is indicated by a decrease in compost temperature at the same air temperature.

X. After pasteurization slowly lower compost through the temperature  ranges of the microorganisms. A general rule is to lower compost  temperature no more than 4-5o F. per day.

    1. Provided that enough food, water and oxygen the microbes will continue to grow.
    2. Different microbes use different compounds and grow at different temperatures.  Therefore it is important to make sure all areas of the beds and room  gradually drop through all temperatures ranges.
    3. Thermophillic fungi grow at lower temperatures and are important because they are able to grow into denser areas of compost.

XI. Composting is considered compete when no trace of ammonia odor  can be detected and the compost has a uniform flecking of white colonies of actinomycetes, called fire-fang.

  1. Compost should have less than 0.1 ppm of ammonia and the N content on a dry wt. basis should be in the range of 2.0 to 2.5.